If you follow me on facebook, you may have seen the facebook live that I did last week with my friend Liz. She is a self described non crafter, and as she said on the FB Live, if she needs something made, she gets my kids to make it for her. But I was out to show her how easy the Cricut Explore made crafting, even if she thought she wasn’t able to do it. To illustrate my point of how easy it was, we decided to pretty up some gifts.

We started by brainstorming some ideas of things we could add to the gifts to make them extra special. Bows, monograms, tags, you name it. Then, we raided my craft room and gathered all sorts of supplies – cardstock (plain, glittered, and patterned), Cricut pens, tape, string, and scissors. And that, my friends, was the hardest part of our day.

How to Get Started Wrapping Your Gifts Using Cricut
We used three different Cricut techniques to make the gift embellishments. We used the pen to make doodle tags, we used print and cut to make some pre addressed labels, and we used the scoring tool to help make the bows.
You guys, Liz figured this out on her own after about 2-3 minutes. It really is that easy. We were whipping out gift toppers like nobody’s business!

You can see our first project (a glittered E monogram, shown above) on the Facebook Live, and here’s a video of our second project, a glittery red 3D bow that will make any gift stand out!
Here are some other pictures of our gift decorating extravaganza. I let Liz loose with the Explore while I went to switch over my laundry, and when I came back, she had created these adorable hearts and monograms for her daughters advent calendars. Look how proud she looks!

Gift Wrapping with Cricut – Using the Pens to Draw Gift Tags
After she had straight cutting down, we got a little more technical and I showed her how to upload png files to create these adorable doodled tags. My phone ran out of juice so I didn’t make a video, but it’s really simple.

- Download your images – I used these adorable Merry Cuties from Miss Tiina, which are a free download.
- Unzip the folder (right click, choose extract all).
- In Design Space, choose “Upload Image”. Click “Browse”, locate the file you like, and upload it as a simple image (meaning it only has few colors with lots of contrast so it is easy for Cricut to pull the layers apart). The next screen will allow you to delete any elements you don’t want to cut (like a background), but these are very clean images on a transparent background, so you shouldn’t have to do anything here.
- Save as a Cut file (not a print and cut).
- Insert it into your Design Space project.

Ta-da! You can now add a tag shape from the image library (if your doodle disappears, right click on the tag and select move backwards – the image above shows the proper arrangement of your final layers) and layer your doodle on top of the tag. Add a text layer to write To and From, then click on the text and the doodle in the layers bar and change them to “Write” instead of “Cut”. Lastly, select all three layers (in your right hand layer tool bar) and attach them.
Gift Wrapping with Cricut – Using Print then Cut to Make Gift Tags
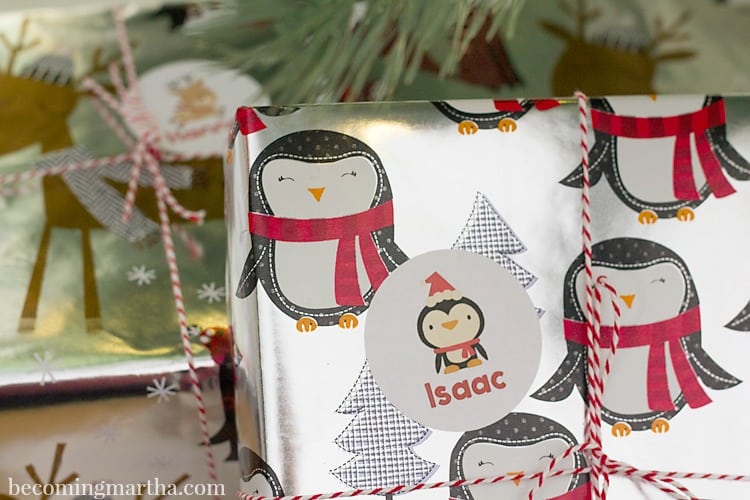
The last project we tackled was the print and cut labels. I knew the image library had really cute images in the Create a Critter cartridges that would be perfects for these tags, so we selected a couple of the Christmas ones and put them in our project. (You could upload your own clipart using the same method we used for the doodle, but choose “Save as Print and Cut” instead of just a cut file.)

Next we inserted circles from the “Insert Shape” option, and sized them to 2″ round and changed the color to white. We copied and pasted the circle, and then typed the names using the font Bluberry Regular. You can change the color by clicking on the layer in the layers menu.

The next step was to arrange the images, circles, and text. Remember to right click and choose “move forward” or “move backward” to get your layers in the correct order. You’ll want the text and critters near the front, and the circles near the back. Once you have them arranged how you like, select all of the layers and choose “Flatten” from the top of the layers menu. This will turn all of the images into “Print and Cut”.

The one thing that is different about print and cut is that it will bring up a printer dialog so your sheet can print. I used sticker paper so that I can just stick them right on the gift. Once printed, place them on your cutting mat and hit “Go” like normal. The machine will read the black lines and know where to cut.

I have to say, the labels are some of my favorites from the day, but those bows though! I love the gold polka dotted one we made after.
Cricut Gift Wrapping Gives Endless Options
So as you can see, the beauty of the Cricut Explore is that it’s not just for crafters. It’s for people who feel they don’t have a crafty bone in their body – it meets you at your level and it offers just as much to the beginning crafter as it does the advanced crafter. The versatility is just one of the many reasons I switched to Team Cricut (umm, have I mentioned that blade?! Okay, maybe I have once, or twice…) and it’s why so many new crafters are starting out on the Explore.

As for me, I’m off to continue wrapping. I think some tiny gift boxes for necklaces are up next. What’s your favorite way to decorate gifts? I’m a sucker for some baker’s twine and pretty bows! Leave me a comment below or tag me in your instagram photos (I’m @simplycraftedlife) and show me all your pretty gifts. I’d love to see!
This is a sponsored conversation written by me on behalf of Cricut. The opinions and text are all mine.
Heather says
So nice to see (and hear) you and Liz! Merry Christmas!